News / Blog Post Management
URL : http://your_domain_name.com/news/
a) Adding a new post
- 1. On the left hand navigation select ‘Posts’ then select ‘Add New’.
- 2. Insert your content as required.
- 3. Insert the image as required by clicking ‘featured image’, set the size of the image to 480 pixels wide x 390 pixels high.
- 4. To finalise click ‘Publish’.
b) How to Edit a Blog Post
- 1. On the left hand navigation select ‘All Posts’ then select the post you want to edit.
- 2. Now underneath the post name select ‘Edit’.
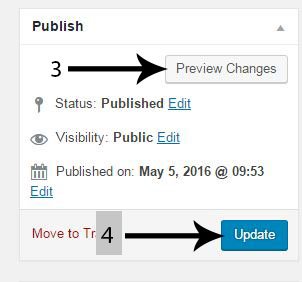
- 3. To view your changes you can select ‘Preview Changes’.
- 4. Ensure to select ‘Update’ to save changes.
c) Timing a post
- 1. As above select / create the relevant post.
- 3. As in the image you can adjust the time and date the post is published.
- 4. Ensure to select ‘Update’ to save changes.
d) Deleting a blog post
- 1. On the left hand navigation select ‘All Posts’ then identify the post you want to delete.
2. Hover your mouse over the post you wish to remove and click ‘trash’. Your post is now removed.
e) Inserting an image / PDF in to a page
On the left hand navigation select ‘Pages’ then select the page you would like to add an image/pdf too.

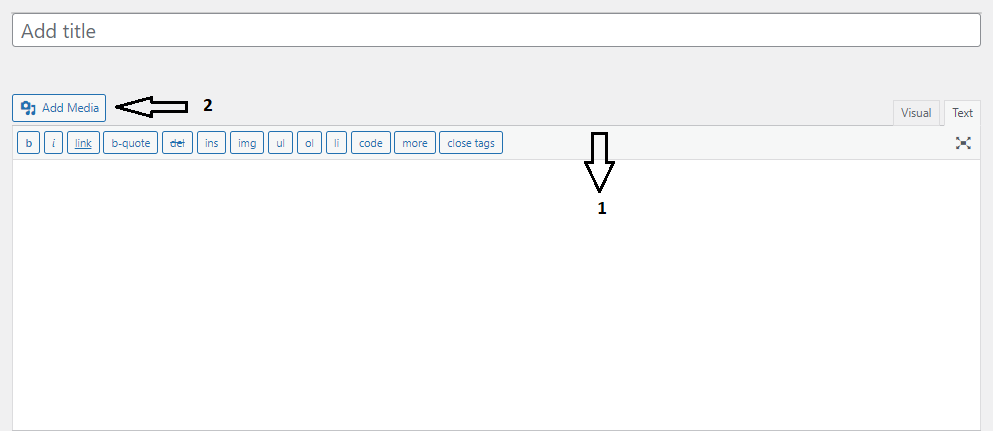
- Click on the content area where you would like to insert an image.
- Click on ‘Add Media’.
- 3. Now select the ‘Upload Files’.
- 4. Either hit ‘Select Files’ and chose the image you want uploading or you can simply drag and drop the file / image you want inserting from your desktop.
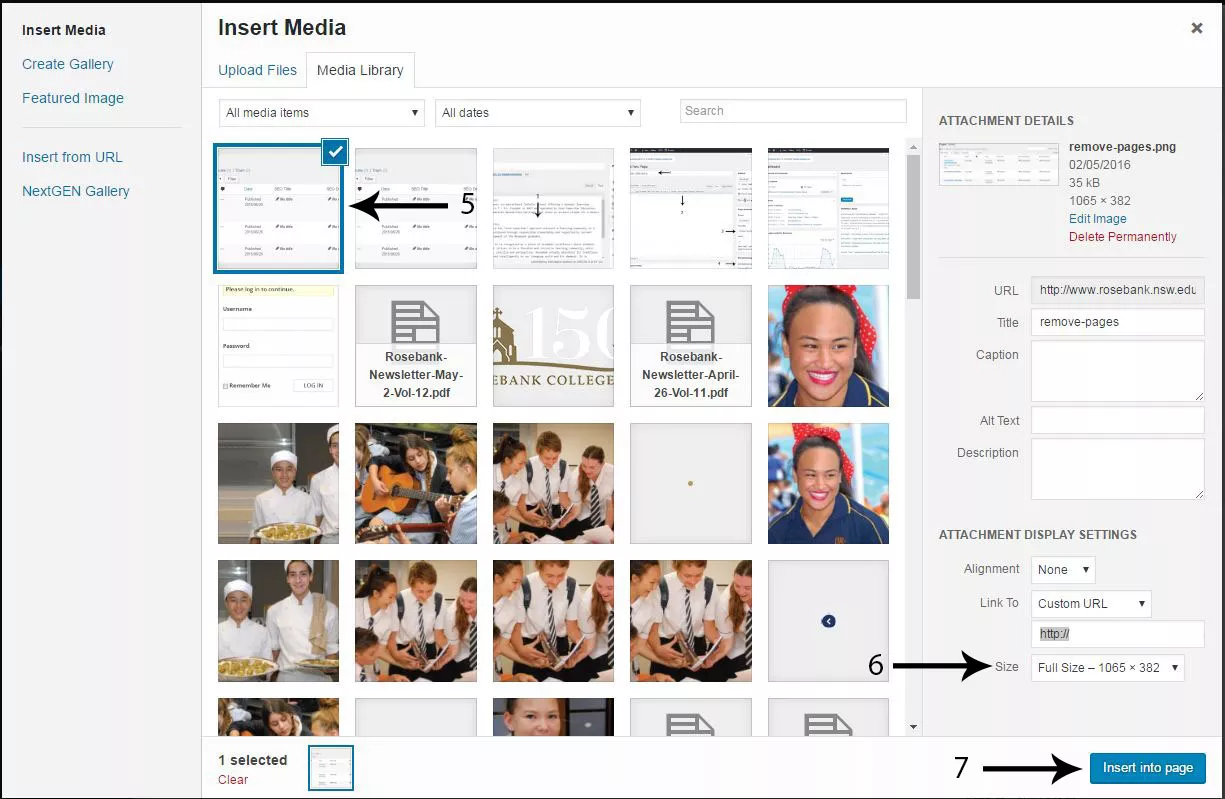
- 5. Once you have hit ‘Select Files’ you will be directed to the Insert Media page which will show you the page you have just uploaded.
- 6. Select ‘full size’ if not already pre-selected, so that the full size of your image is displayed.
- 7. Hit ‘insert into page’.
- 8. Here you will see the link of your image / pdf which has been uploaded.
- 9. For Pdf to open in new tab you will have to type target=”_blank” between “a and href”.
- 10. Click ‘Update’ to save the changes.
Your image has been updated/uploaded in your page.

